Difference between revisions of "HPL3/Color Grading"
m (formatting) |
(→Creation Guide: added note about the modern nvidia texture tool) |
||
| (7 intermediate revisions by the same user not shown) | |||
| Line 1: | Line 1: | ||
| − | + | {{shortPageTitle}} | |
| − | |||
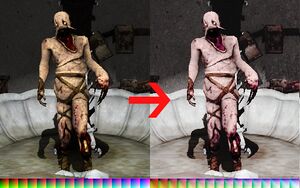
[[File:Grading.jpg|thumb|Color Grading example]] | [[File:Grading.jpg|thumb|Color Grading example]] | ||
| − | + | Color grading is a way to map the color of a pixel to another color. This can be used to change the brightness, contrast, hue, saturation, … of a whole image.<br /> | |
| − | + | It is possible to smoothly fade between two different grading templates.<br /> | |
| − | + | It uses a small 3D texture with a color as input and another color as output. | |
| − | Color grading is a way to map the color of a pixel to another color. This can be used to change the brightness, contrast, hue, saturation, … of a whole image.<br />It is possible to smoothly fade between two different grading templates.<br />It uses a small 3D texture with a color as input and another color as output. | ||
== Creation Guide == | == Creation Guide == | ||
| Line 13: | Line 11: | ||
* Photoshop (CS5 or later recommended) | * Photoshop (CS5 or later recommended) | ||
* [https://developer.nvidia.com/gameworksdownload#?dn=texture-tools-for-adobe-photoshop-8-55 NVIDIA Texture Tools for Adobe Photoshop v8.55] - Download the correct version for your system (probably 64-bit) | * [https://developer.nvidia.com/gameworksdownload#?dn=texture-tools-for-adobe-photoshop-8-55 NVIDIA Texture Tools for Adobe Photoshop v8.55] - Download the correct version for your system (probably 64-bit) | ||
| + | ** The modern Nvidia Texture Tool should also work using equivalent settings.{{confirm}} | ||
===Setup=== | ===Setup=== | ||
| Line 21: | Line 20: | ||
# Place the color strip anywhere in the image | # Place the color strip anywhere in the image | ||
# Flatten the image to merge all the layers | # Flatten the image to merge all the layers | ||
| − | # Select "Image > Mode > 8 Bits/Channel" in the top menu | + | # Select "'''Image > Mode > 8 Bits/Channel'''" in the top menu |
''Note: FG documentation originally listed 16 Bits/Channel, however this seemed to result in incorrect color grading results.'' | ''Note: FG documentation originally listed 16 Bits/Channel, however this seemed to result in incorrect color grading results.'' | ||
===Adjustments=== | ===Adjustments=== | ||
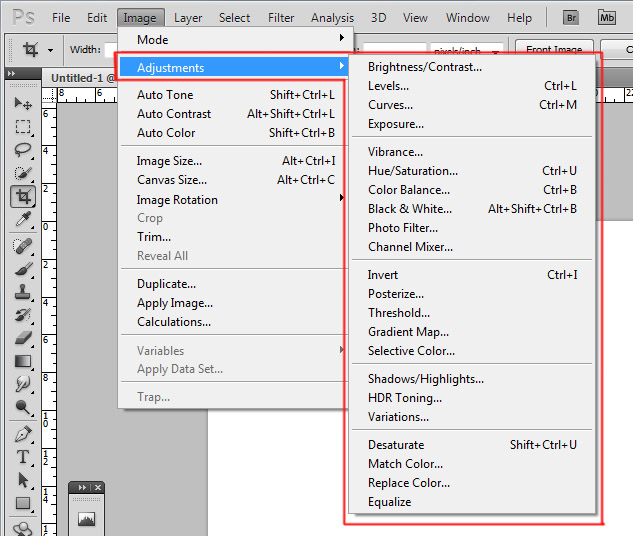
| − | * Use any of the options in "Image > Adjustments" | + | * Use any of the options in "'''Image > Adjustments'''" |
* These can be used to change the brightness, saturation, contrast and so on | * These can be used to change the brightness, saturation, contrast and so on | ||
* Any changes you see on the image in Photoshop will carry over to the game | * Any changes you see on the image in Photoshop will carry over to the game | ||
| − | [[File:adjustments.jpg | + | [[File:adjustments.jpg]] |
===Layers=== | ===Layers=== | ||
| Line 48: | Line 47: | ||
[[File:crop.jpg|thumb|Example crop]] | [[File:crop.jpg|thumb|Example crop]] | ||
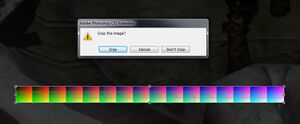
# Crop the color strip from the canvas, make sure the resulting image is 256×16 px | # Crop the color strip from the canvas, make sure the resulting image is 256×16 px | ||
| − | # Select "Save | + | # Select "'''Save a Copy...'''" and set the format as "'''D3D/DDS (*.DDS)''''" and save it in the folder "'''/textures/colorgrading/'''" |
| − | # In the DDS format settings select "8.8.8.8 ARGB 32 bit | unsigned", "Volume Texture", "No MIP maps" | + | # In the DDS format settings select "'''8.8.8.8 ARGB 32 bit | unsigned'''", "'''Volume Texture'''", "'''No MIP maps'''" |
| − | [[File: | + | [[File:DDS Format Fixed.png]] |
== Level Usage == | == Level Usage == | ||
Latest revision as of 10:54, 31 March 2023
Color grading is a way to map the color of a pixel to another color. This can be used to change the brightness, contrast, hue, saturation, … of a whole image.
It is possible to smoothly fade between two different grading templates.
It uses a small 3D texture with a color as input and another color as output.
Contents
Creation Guide
Requirements
- Photoshop (CS5 or later recommended)
- NVIDIA Texture Tools for Adobe Photoshop v8.55 - Download the correct version for your system (probably 64-bit)
- The modern Nvidia Texture Tool should also work using equivalent settings.[Confirm]
Setup
- Take a screenshot of the game with color grading disabled
- Open the screenshot in Photoshop
- Drag and drop the default grading texture on the canvas (found at /core/textures/grading_default.dds)
- Place the color strip anywhere in the image
- Flatten the image to merge all the layers
- Select "Image > Mode > 8 Bits/Channel" in the top menu
Note: FG documentation originally listed 16 Bits/Channel, however this seemed to result in incorrect color grading results.
Adjustments
- Use any of the options in "Image > Adjustments"
- These can be used to change the brightness, saturation, contrast and so on
- Any changes you see on the image in Photoshop will carry over to the game
Layers
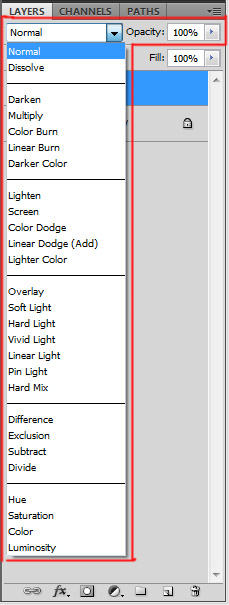
It is also possible to use the any of the layer blend modes.
There are two kinds of layers allowed:
- Solid color
- Dupilcate of the first layer
It is possible to duplicate the first layer and make adjustments to it and then blend it.
The use of Layer Masks is allowed as long as they are generated from the image and not hand painted.
Saving
- Crop the color strip from the canvas, make sure the resulting image is 256×16 px
- Select "Save a Copy..." and set the format as "D3D/DDS (*.DDS)'" and save it in the folder "/textures/colorgrading/"
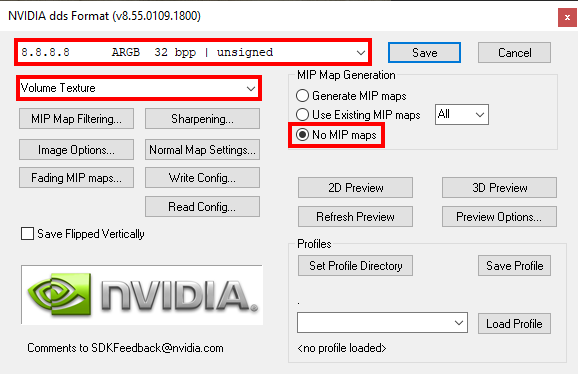
- In the DDS format settings select "8.8.8.8 ARGB 32 bit | unsigned", "Volume Texture", "No MIP maps"
Level Usage
You can apply your color grading texture either in the Level Settings or via the level script.
