Difference between revisions of "HPL2/TDD/Creating a Custom Story"
Jump to navigation
Jump to search
 The simplest way of starting a Custom Story is downloading a template. The following tutorial will help with understanding what those files do.
(→Wrapping up your Custom Story: Made smth more understandable) |
m (Mudbill moved page Hpl2:Amnesia:custom story to HPL2/TDD/Creating a Custom Story without leaving a redirect) |
(No difference)
| |
Revision as of 05:00, 4 August 2020
To do: Reupload the template to the wiki
Wrapping up your Custom Story
This list assumes that you already went through all the level design, special entity creation, level building and scripting, and that you want to fix your custom story so it shows in the Custom Story launcher.
To do: The above is misguiding and should probably be deleted.
- Create a subfolder (story root from now on) for the story under
redist/custom_stories. Name it anything you please. Keep in mind that changing this folder's name might break certain things in maps made when the folder had the previous name. - Copy your maps, scripts, and anything you created for the custom story into the story root. You may want to organize all stuff in subfolders. Maps with corresponding scripts, by default, should be located in a subfolder called 'maps'.
- Create a text file named 'custom_story_settings.cfg' in the story root. The contents of this file should look like this:
<Main
	Name="A cannon story"
	Author="Luis Rodero"
	ImgFile="cannonbg.jpg"

	StartMap="luis_script_test.map"
	StartPos=""
/>
- Name: Name of the custom story. 'Unnamed Story' will be shown if empty.
- Author: Name of the author. 'Anonymous' will be shown if empty.
- ImgFile: Image file that will be used as background in the Custom Story Launcher. This is optional.
- StartMap: File name of the map that will be started when the custom story is launched. This value cannot be empty.
- StartPos: Name for the position in the start map where the player will be spawned. If empty, the first one defined will be used.
- All custom messages, diaries and notes that your custom story needs in a 'extra_english.lang' file in the story root. If translations want to be made, these are to be created as 'extra_' + name_of_the_supported_language + '.lang' files, with name_of_the_supported_language being one of the ones that you can choose in the game options menu. Optionally, this can contain an entry "Description" in the "CustomStoryMain" category, and any brief description on the custom story can be written here. It will be displayed in the Custom Story Launcher. Just to display an example:
<CATEGORY Name="CustomStoryMain">
    <Entry Name="Description">Just a brief description!</Entry>
</CATEGORY>
- You must use the EXACT tags as shown for CATEGORY. Also, the CATEGORY tag must be inside the required LANGUAGE tag in the 'extra_english.lang' file. So, if you have nothing else other than the description, it should look like the following (take special note of upper-case vs. lower-case - it must be EXACTLY like this)
<LANGUAGE>
   <CATEGORY Name="CustomStoryMain">
      <Entry Name="Description">
         Just a brief description!
      </Entry>
   </CATEGORY>
</LANGUAGE>
- If you do not capitalize EXACTLY as shown, it WILL NOT work. If you don't have the enclosing LANGUAGE tag, it WILL NOT work. Only one LANGUAGE tag should be in the 'extra_english.lang' file. All 'CATEGORY' tags should be inside that.
Once all this is done, you should be ready to go! The example used should look like this:
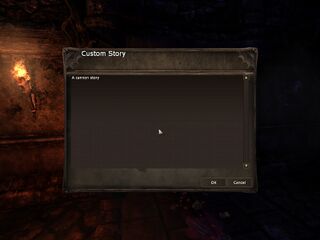
On the Custom Story List window

After selecting a Custom Story


To ease installation for others, you may now archive the full story root directory, stored from the custom_stories folder. The archive directory tree from the example should look like this (assuming the story root is called TheCannonMap):
  TheCannonMap/
  |- maps/
  |  |- luis_script_test.hps
  |  |- luis_script_test.map
  |
  |- cannonbg.jpg
  |- custom_story_settings.cfg
  |- extra_english.lang