Hpl3:Tutorials:material translucent
Contents
Translucent Material
Overview
Here it will be explained how to set up an entity with a translucent material. There is a lot of differetn techniques and programs that can be used to make the images used in this tutorial, so the focus will be mainly on using the engine's tools.
Steps
1) Setting up the model.
First of all the model needs to be be set up and have a diffuse texture set to it (more info here). The file we have are:
transbox.dae
transbox.dds
Now we open transbox.dae up in the modelviewer and will see: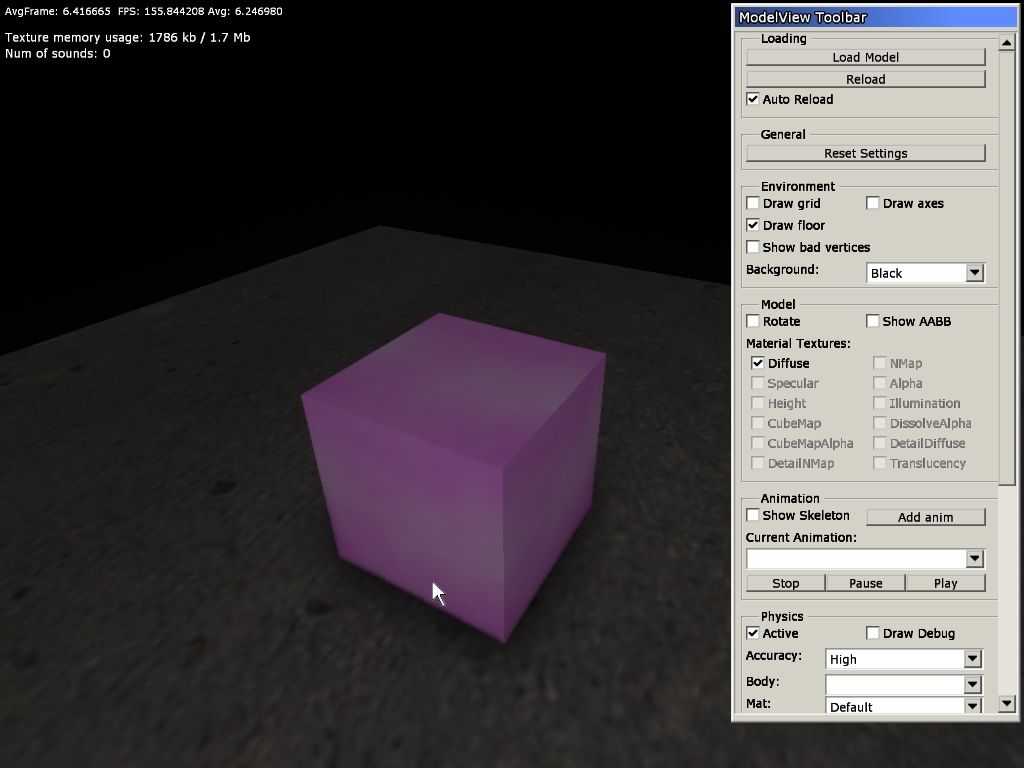
The files we have are now:
transbox.dae
transbox.dds
transbox.mat
transbox.msh
the ".mat"-file is generated by the modelviewer and is a solid material based upon the name of the diffuse texture (here "transbox"). Modelviewer can add further texture such as normalmaps, specular, etc if the files have the proper prefixes (for a list of those see here).
The "msh"-file is a binary version of the dae file that is much faster to load. No need to worry about that one in this tutorial.
2) Changing to Translucent.
Now open up MaterialEditor (leave modelviewer open) and open "transbox.mat". Here change the type to "translucent" and the blend mode to "mul" (you can use other blend modes, but mul is often the best when dealing with translucent surfaces).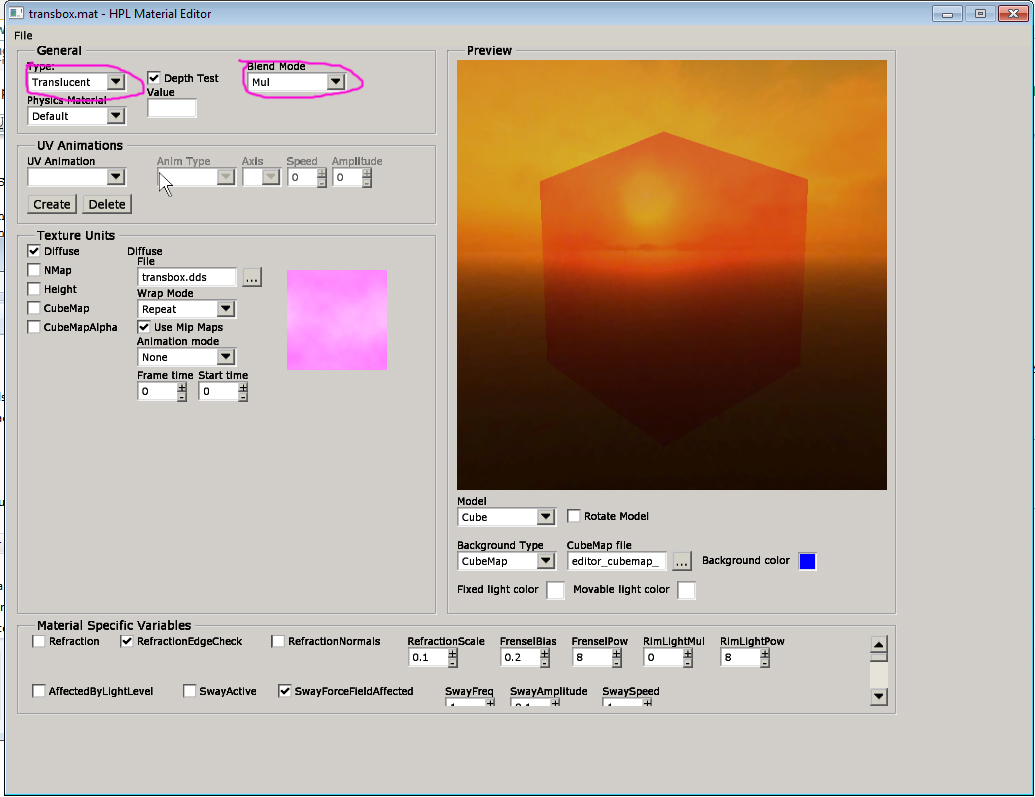
Chose "Save" in the file menu.
You can now simply task switch to the modelviewer (no need to close and open) and the changes will appear).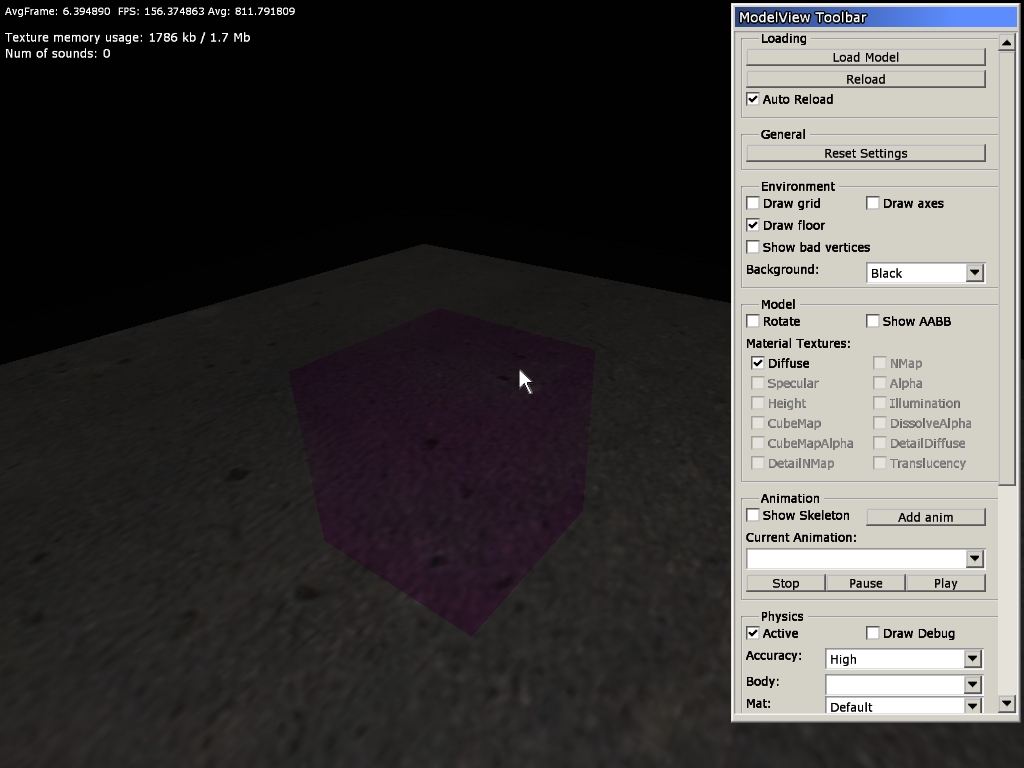
3) Adding Reflection
The material looks a bit more translucent, but there is still a lot more that can be done. The next thing is to add a cubemap that will form an environment map for the material.
First of all a cubemap needs to be created and converted to the dds format. This is best done using ATI's CubeMapGen (found here) or a similar tool. When creating the normal, just use some environment that looks sort of like what the object can be found in and blur it a lot (as long as it looks good in the modelviewer, it does not matter that much). When generating the cubemap it is very, very important to use a an edge fix, and to use an generator that can do this for mipmaps, or else there will be ugly visible lines in the seams between the six faces. Also make sure that the dds file contains mipmaps!
Cubemaps are placed in "textures\environment" and NOT in the same folder as the dae, mat, etc files! This because one cubemap can be used for many different materials. Name the environment map like this: [environment]_env, eg: "livingroom_env.dds"
Now in the MaterialEditor, check the CubeMap checkbox and then select the cubemap you have created. You will now see that box has gotten a reflection: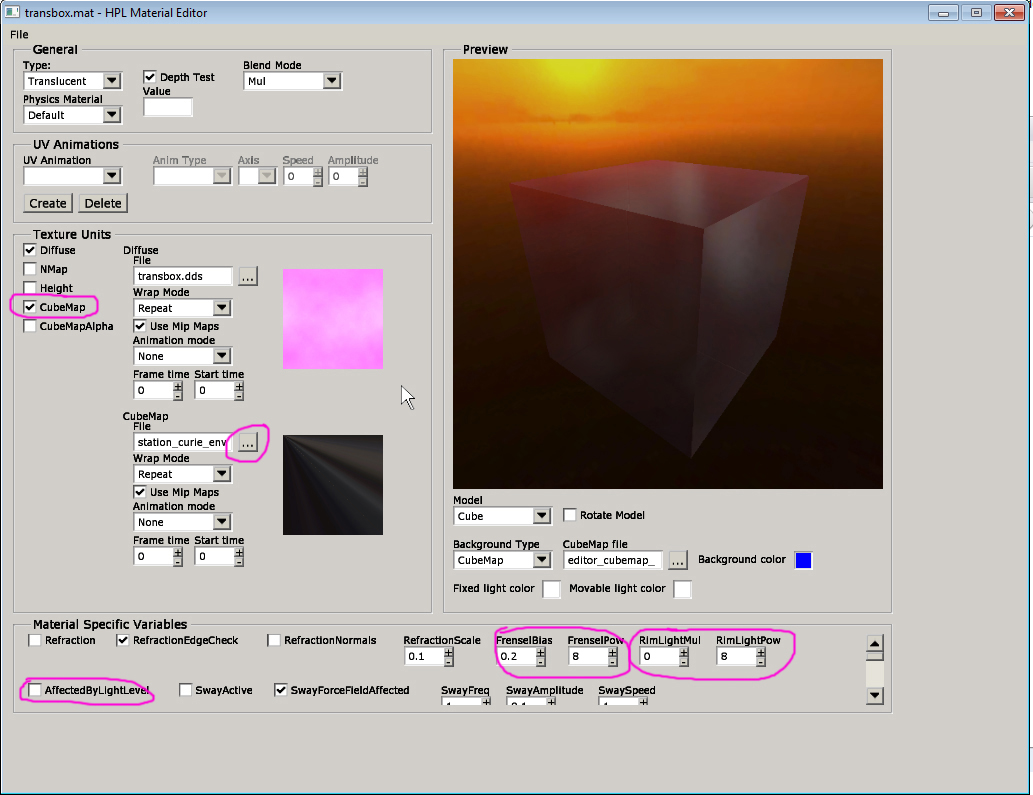
You can now play around the the frensel properties to change how the reflection changes depedning on the slope of the surfaces. The default values are pretty good in most cases though.
More importantly, if you have a rounded objects (unlike this cube) try changing the two RimLight parameters to get a nice glow around the edges that enchances the shape of the objects.
Finally the AffectedByLightLevel parameter should be checked if you know that the object will be in an environment where the general light level change a lot. What it does is to make the opacity of the model depedning on the average light the model is in and makes it not seem glowing when in darkness. Can keep this off as default as it takes a bit cpu resources and turn on if it turns out it is needed.
4) Adding Refraction
Still the model does not look as much as translucent as it could be. What you want to add then is refraction. To do this, simply check the boxe saying "Refraction". What this does is that it gives the background a bit of an offest simulating that light refracts through the material (not that visible on this cube). Also play with "RefractionScale" which changes how much the background is distorted (do not overdo this since the model might look strange up close if too high).
Switch to the Modelviewer (again no need to restart) and the effect is quite visible: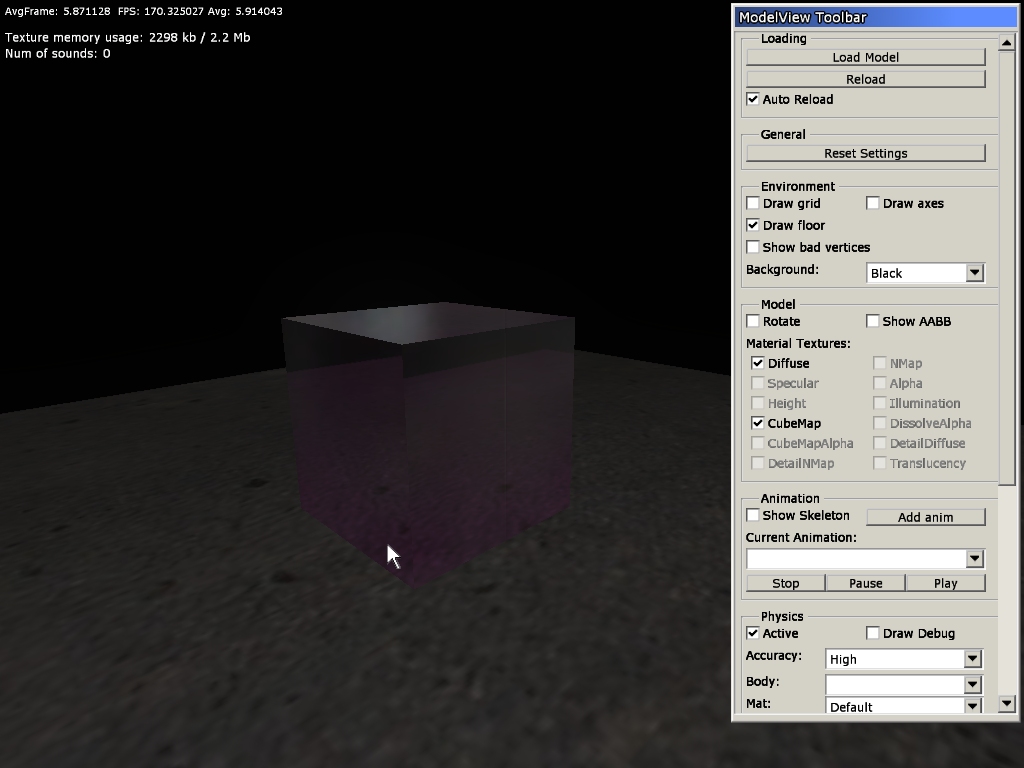
Sometimes the geometry of the mesh is not enough to give proper refraction and in that case, you need to add a normalmap. So now the file "transbox_nrm.dds" is added to the same folder as transbox.dae, etc. Open the MaterialEditor, select NMap and pick the texture: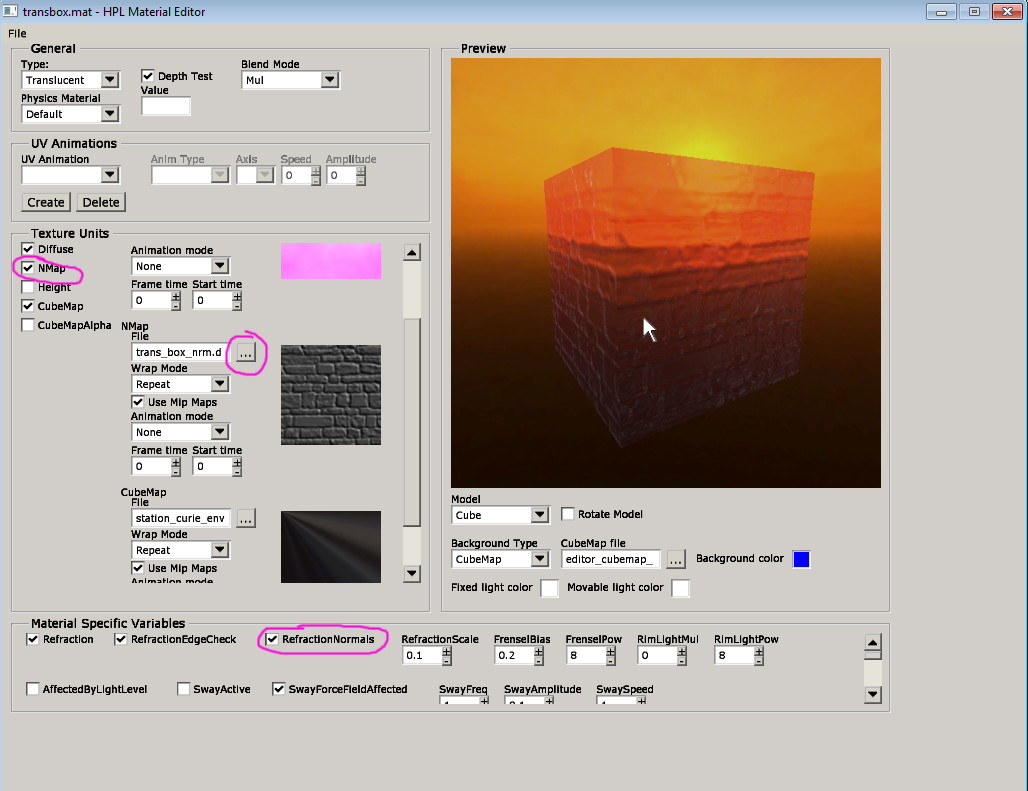
You also want to check the parameter "RefractionNormals". With this on, the normalmap normals are rotated according to mesh normals, creating a better refractive feel. In some cases this is not wanted, but for most objects it is! And as always simply save and task switch to the modelviewer to see the texture with your model: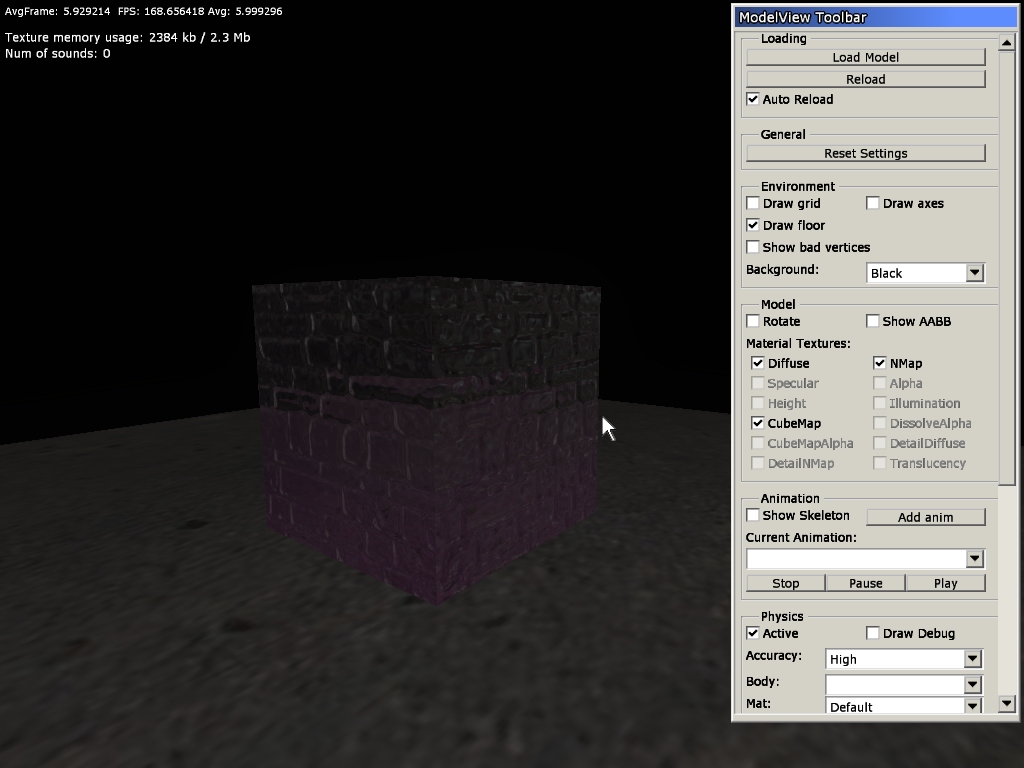
Note that refraction is quite demanding, especially when there are a lot of objects with it in view at the same time. So if you want to have lots of glass shards or similar, then skip it for them. For most objects it should be no problem.
Also another trick is that whenever possible make sure that as many objects as possible are combined when they have refraction. For example, if a model has three windows, each with refraction, do NOT add these as three submeshes. Instead combine them all into one submesh, and that can lead to nice speed-ups!