Hpl2:Tutorials:level editor:tutorial 1
Contents
Level Editor - The Basics
Building a basic room:
The basic objects
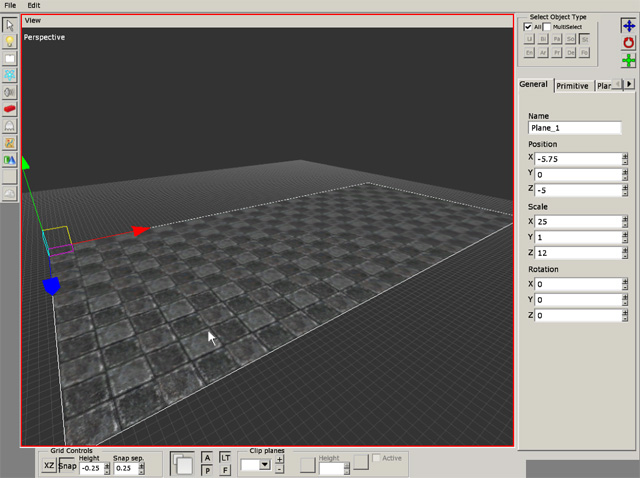
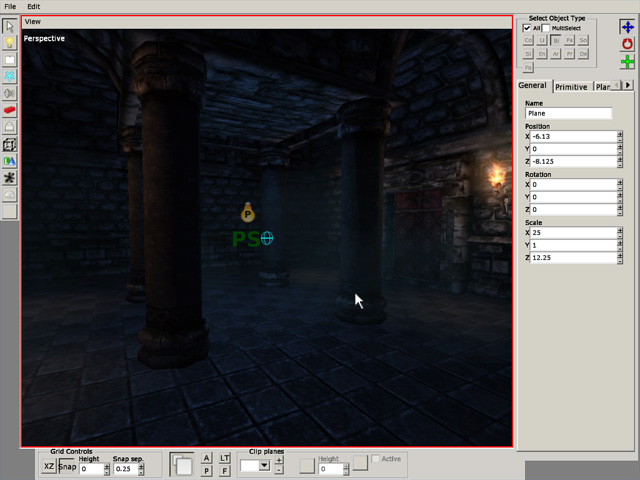
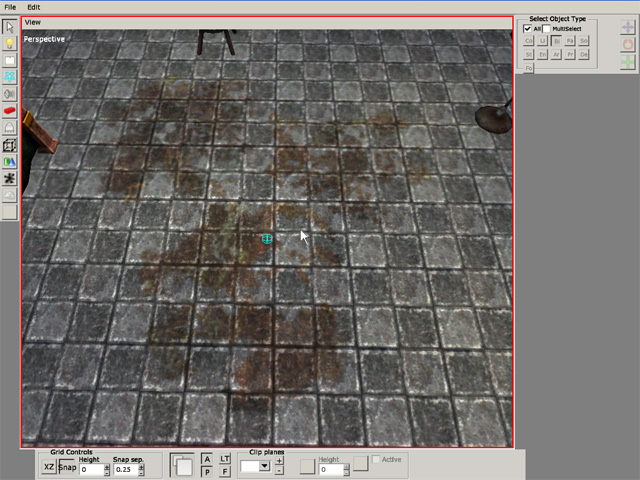
We will begin with building the floor of the level. Select the primitives tool in the toolbox. In the right tab you can now see that plane is the default selected primitive. This is the primitive we will use for our floor. Click the dotted button next to the material field to bring up the texture browser. Enter Static_objects/castlebase/ and select castlebase_tiledfloor.mat. Now click & drag an area in the perspective view to create your floor. Do not worry if the floor gets to small or too big, this can be changed after creation by selecting the primitive and changing its size values. The size of my floor is: X=25, Y=1 Z=12. It should look something like this:
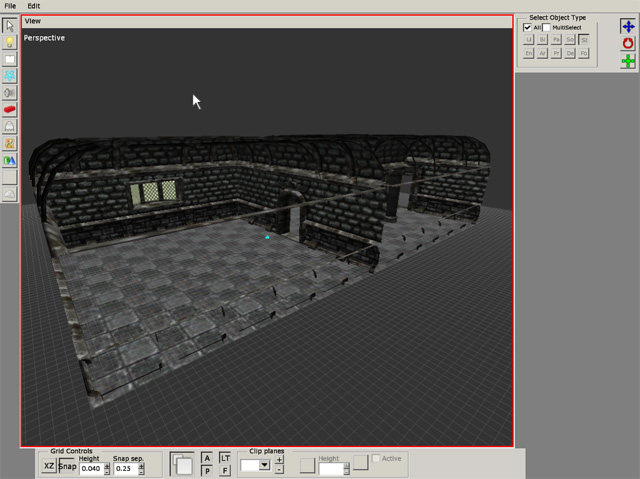
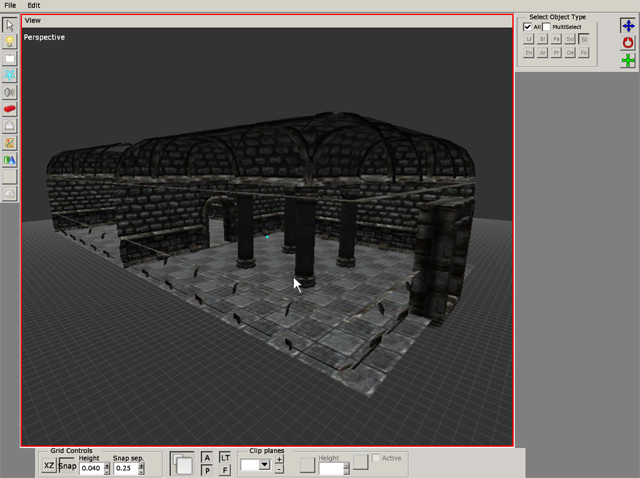
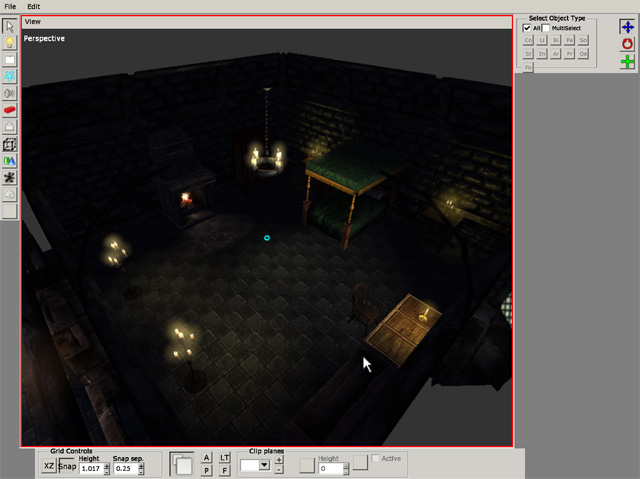
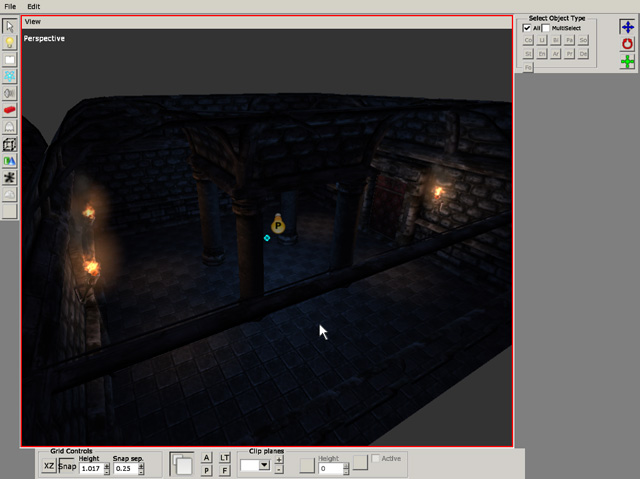
Now, once we have a floor its time to add the walls. Click the Static_objects button in the toolbox and select castlebase in the pulldown menu in the top-right side of the GUI . The list under the pulldown menu should now be filled with all the objects in the Castlbase set. Scroll through the list until you find a grey '- wall' tab. These are all the walls in the castlebase set. Select the 'default' wall and place it on the floor. Before placing the wall you can turn and scale it as you please. These values can also be changed after you've placed the wall. Look through the list and try to replicate the level you see in the pictures below. If you get stuck or get tired of experimenting with the different pieces you can use my tutorial file: (xxxxx.xxx) to continue.
Entities
Now we have a room but it does not look like much. It is time to add some detail. Click the entities button in the toolbox. On your rightside menu you can now choose between several kinds of entities. Select the door category and the castle_arched door. Place it in the middle doorhole and you now have a working door. Most of the door's characteristics are determined in the model editor, but you can change some minor options. You can find these option in the entity tab in the rightside menu (see below). However we will leave this one unlocked or it will make you unable to finish the level.
Select the level_door in the list and put it in the last doorhole. This is a special door and acts as a portal between levels. After it is placed you can input all the data needed for it to link properly in its entity tab.
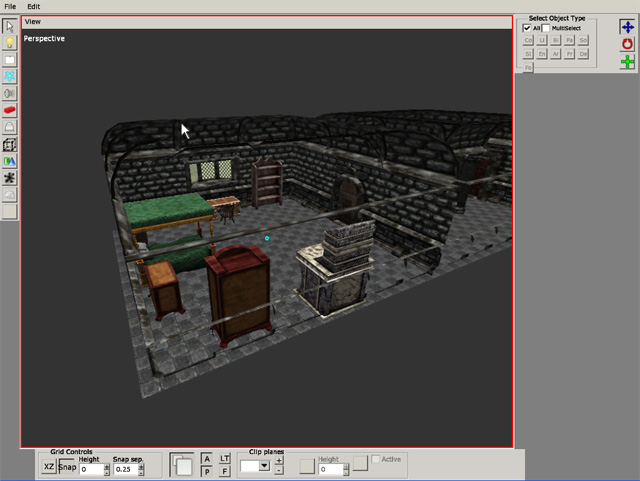
Experiment with the the other objects in the list and try to replicate my room in the image below or build a room of your own.
Lighting
The level is now pretty detailed but it is very dark. If you were to turn off the ambient lights, it would be pitch black even though you have put a window in the room. This brings us to the lights which are connected to the entities in sense. If you select the 'Light' button in your toolbox you will see that you have three different light types to choose from: box light, point light, and spotlight. The box light illuminates everything within the box, the point light illumates everything in an area from the centerpoint, and the spotlight works like a normal spotlight would in real life. In addition to these basic lights we have a category in entities named lamps. All of these entities have light objects bound to them and you can use them to illuminate your levels.
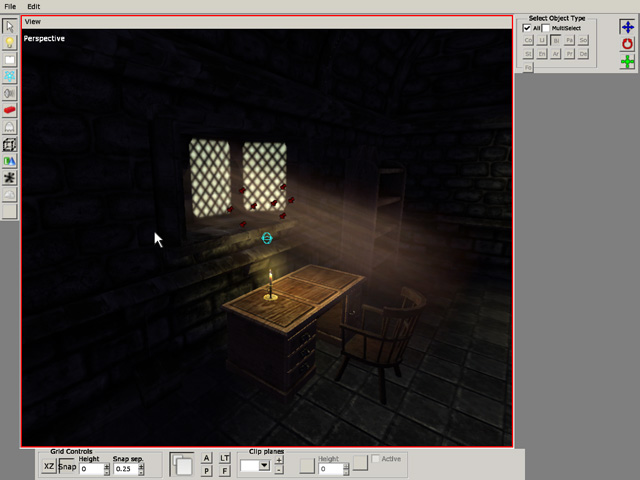
Let us start by making a light that comes in from the window. Select the 'Light' button in the toolbox and then select the spotlight. Put it outside the window and select the 'Spot' tab. Here you can rotate it so its light points towards the room. As you may notice, the light is not filling the whole room. Its radius is too small for this room, so change it to 17.5. It looks a bit strange since it only illuminates a small spot on the floor. We will remedy this by using a custom falloff map. Click on the '…' button next to the spot falloff map field and select 'light_falloff_short_fade.tga'. Now the room is much brighter. White light may look nice, but in some cases you may want a warmer color. Switch back to the 'General' tab and find the box marked 'Diffuse Color'. Click it to change the color of the light. Choose a nice fitting color (I chose R=0.7, B=0.7, G=0.55). In the check box under the color you can toggle the shadows on/off. In this case we will leave it off since it may give us strange shadow when the light is outside the level.
With the light streaming in from the window, you might notice that the unlit parts are still pitch black. This does not look very natural and to remedy this we will place a box light in the middle of the level. Change the size so it encapsulates the whole level and pick a fitting color, preferably a dark color since this will be the only light in the dark corners (I chose R=0.085, B=0.08, G=0.14).
In the final room we will set up a somewhat unatural ambient lighting with a point light. Select the point light and place it in the middle of the second room. Change the radius until the room is lit to your satisfaction. Change the light to a fitting color (I chose R=0.195, B=0.36, G=.59).
There are still some dark areas and now is a good time to try out the lamp entities. Decorate and light your level as you like. In the pictues below you can see how I lit my level.
Billboards & Particles
With the entities & lighting taken care of, we now have a functioning level, but it need some finishing touches. It is time to play with billboards, decals and particles. Let us start with the light in the window. Select the 'Billboard' tool in the toolbox and place it in the level. Select the billboard and click on the 'Billboard' tab. Click the '…' button next to the 'Material File' field and select 'bb_lightyellow_lightray.mat'. Now you have a picture of light beams hovering in the air. They always face your camera which can be good when you make halos, but it does not work well in this case. Change the billboard type to 'Fixed axis'. Now you have full control over the billboard. You can change the size in the fields below (I chose x=2, y=6.5). In the 'General' tab you can rotate and translate the billboard until it is where you want it to be. In the pictures below, you can get see how I did it. Play around with the billboards until you are satisfied. In the 'Billboard' tab, you can also select a color to tint the billboard in case the original color does not fit your light (I chose R=0.3, B=0.25, G=0.2. It might seem very weak in the editor but it is stronger ingame).
Now with the light beams in place, we will add some particle fog to the other room to make it a bit more spooky. Select the 'Particle' tool in the toolbox and place it in the second room. Select the 'Particle System' tab and click the '…' button next to the 'Particle System File' field. Select "ps_area_fog_large.ps". Change the color of the fog to match the light in the room (I chose R=0.17, B=0.4, G=0.5). To get a better transition when you move through the fog, we will enable the 'Fade at distance' box and enter the values where the fog will start to fade in and out. I chose the values Min End=2, Min Start=5, Max Start=20, and Max End=25. These values mean that the fog will be invisible until the player is 25m from it, then it will fade in until the player is 20m from it. It will then be fully visible until the player is 5m from it and will fade completely at 2m. Copy the particles and place some more around the room to fill it with fog particles. You can see how I have done it in the picture below.
Decals
Decals are used to add details to levels and to break up the repetitive basic objects. Select the 'Decal' tool and choose a decal in the material window. You can paint these decals in the levels. Just click to place a decal. Try not to overlap the decals too much; overlapped decals have a tendency to flicker and it will not look good. You can also randomize the angle and size of the object when it is placed. This is good when you place the same decal in many places on the same object. Also, there is a tint option, so you can make decals fit in many different locations.
Sound & Areas
Most of the entities have sound files in them when required, but sometimes you will want to add ambient sounds. You can do this with the 'Sound' tool. Just select the 'Sound' tool, input a sound file you want to use, and place it where you want it. In the 'Sound' tab you can set the area where the sound can be heard and its volume.
Areas are used for a lot of things in the game. They are needed for ladders, AI nodes, and the most important one is used for setting the starting position of the player. Select the 'Area' tool and select 'Playerstart'. Place the area where you want the player to start so that the bottom of the cube is sitting on the floor. The blue arrow points where the player looks when he spawns in the level. You now have a working level. Theres more you can do in the editor that is not written here, open up some of our levels and see how we solved some of the more advanced problems. Good luck and start building levels.
