HPL3/SOMA/Level Design/Level Editor View
Contents
Viewport area
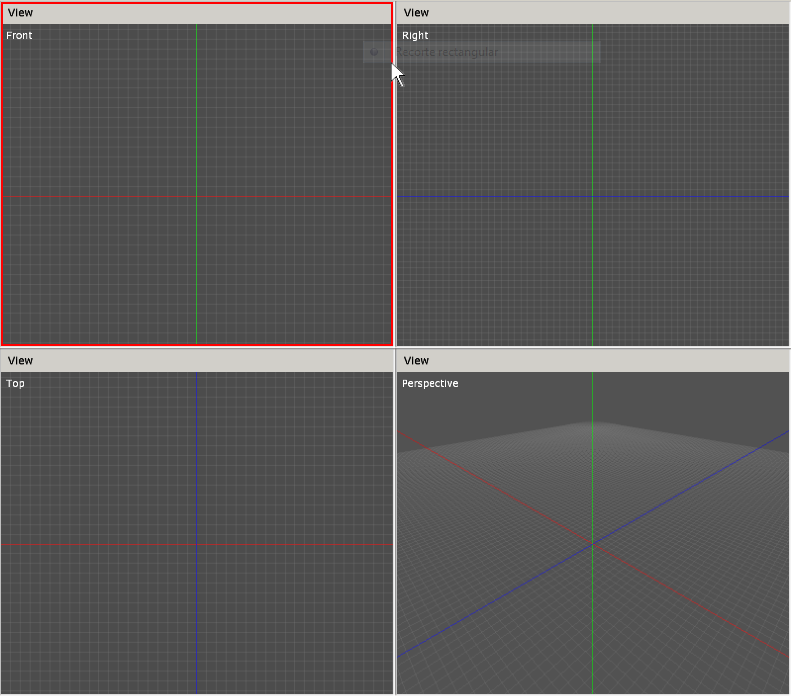
This area is meant to actually show what the map contains. There are four viewports in this editor, and their initial setup is shown in this picture:
Viewport in focus
When working on a map, only one viewport will be focused at a time. This is shown by a red highlight around the currently focused viewport (in the picture above, focus is on the lower right viewport). To set the focus on a viewport, just move the mouse into it.
In the Level Editor, some controls for the currently focused viewport is shown in the Lower Toolbar.
View Menu
Each viewport has a "View" menu bar, which includes the following options:
- Camera Mode: choosing an item from this submenu will reset the viewport to a preset. An ortho preset means that it will use orthographic mode, so no perspective distortion will be seen. All presets reset the camera target to a (0,0,0) position. One out of the following presets can be picked:
* Front: ortho preset, scene will be seen from the front. * Right: ortho preset, scene will be seen from the right side of the objects, pointing to the left. * Top: ortho preset, scene will be seen top-bottom. * Perspective: this is the only perspective mode, will reset the camera position to (10,10,10).
Render Mode: the mode that will be used by the viewport to draw objects * Wireframe: only edge lines for polygons will be drawn in this mode. * Shaded: drawing will be fully done, using lighting just like ingame. Ortho presets cannot use this mode. Controllers: under this item you will find the available controllers for the current view. These can either be Maya or Fly. More details later. Show Grid: toggles showing of the helper grid. Show Axes: toggles showing of the XYZ axes.
Moving and looking around
Depending on the active controller, moving will be done differently, but all are activated using the view mode key (default left Alt). When this key is held, the red focus frame will turn yellow.
Linux Note: Left Super (aka "Windows" or Apple key) and the Z key are also the view key as the Alt key is usually bound by the Window Manager.
Mac OS X Note: A three button mouse is required to use the editor.
Maya
All movement and looking will be done using the mouse. In a nutshell, there are three basic movements that can be done:
Tumble: pressing the 'view' key and the left mouse button at the same time will activate the Tumble mode. This means the camera target will stay in place while the camera will orbit around it. Track: pressing the 'view' key and the middle mouse button at the same time will activate the Track mode. According to the track mode that is set, this will behave in two different ways: * Tracking lock to grid is disabled: the camera target will move along the current screen plane, meaning it will move left-right or up-down along with the mouse. The camera position will stay the same with respect to the target. * Tracking lock to grid is enabled: this allows the user to click on the grid, hold and drag to get a camera displacement. Pretty useful when one wants to cover large distances. This mode is forced in ortho views. Zoom: pressing the 'view' key and the right mouse button at the same time will activate the Zoom mode. Moving the mouse forward/backward will then zoom in/out respectively. Note there are limits for zooming in and out. You can also zoom in/out by rolling the mouse wheel up/down.
Fly
Looking around is done with the mouse, moving is done with standard FPS controls: W key moves forward, S key moves backward, A and D goes left and right respectively. Q and E for moving up and down.
Enlarging a viewport
When working in a viewport, the common thing to do is enlarging it. This can be done by clicking on the 'enlarge button' in the lower toolbar, or pressing the shortcut for it (spacebar).
