Level Editor - Light tutorial
|
|
This article needs to be cleaned up to conform to a higher standard of quality because: The formatting is quite messy.
|
It is crucial to spend time making the light design for a level, a lot of atmosphere and a general impression of polish rely on the light. This tutorial will show what different types of lights there are, where they are used to an advantage and how to use special entities called Lamps. Lamps also have a gameplay element, requiring some planning and setup to create the best result for the end user experience.
The tutorial ends with an overview of how this is all implemented in Amnesia and some general pointers on how to optimize the level, lights have a tendency to slow things down!
Contents
Different types of light
The Level editor can create three types of lights: Point, Spot and Box. The most common and general purpose light is the Point light, while the Spot and Box are lights for more specific purpose.
General Light Properties
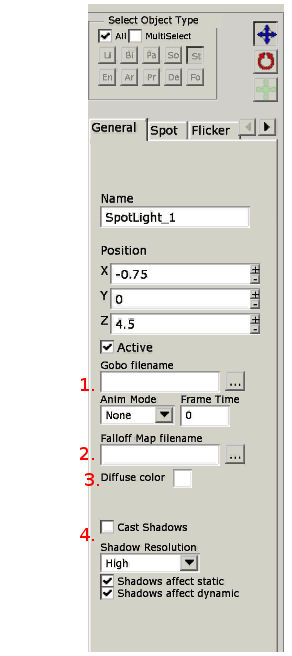
All the lights have common properties, in particular the Point and Spot types. Here is a quick rundown of what the different properties are (only those mentioned in this tutorial), for a more specific list see Level Editor Documentation.
- Gobo is a texture being cast by the light. For example if you have a window with colored glass plattern, you can use a texture to make the light cast that color pattern on the floor. This gives the impression of the light really shining through that window, even though you will most likely place the light inside the room (it's more efficient). You can also use animations, for example mimic light reflecting on the water surface back onto the ceiling.
- Falloff map, is an image going from white to black, where the ratio of the change from white to black decides how fast the light fades out from its center to the end of the radius.
- Diffuse color, sets the color of the light. In Red, Green, Blue and Alpha. The Alpha is used to decide the amount of specular intensity in textures that the light affects.
- If a light should cast shadows, this only works for Spot lights. You can also change the resolution, lower is faster. Also, if only static objects should cast shadows or both static and dynamic objects (books, items, doors etc).
Point Light
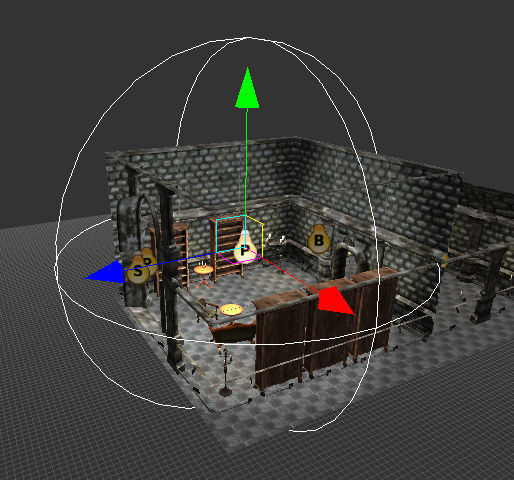
The Point light is simply a light that is cast as a sphere. It can easily be used as an ambient light for a whole room, a specific light source (the light of a candle) or to give the impression of being cast from a hole in the ceiling (placing a small, intense light close to the ground below the ceiling will create this impression).
A Point light can NOT cast shadows, hence you have to be careful in how you light your level. For example a light that does not cast a shadow, will cast its light through walls, so placing a large Point light close to a wall with a dark corridor behind it will not look good, as the Point light will shine out in the corridor. This can be solved in numerous ways, which is explained later.
Spot Light
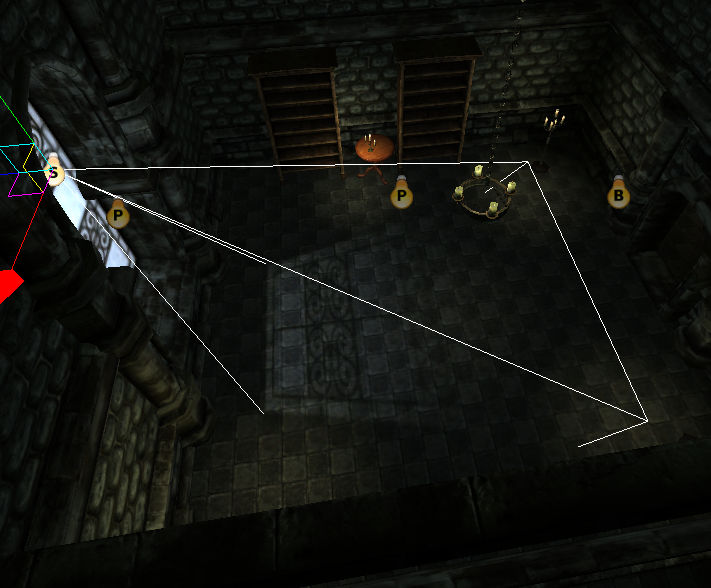
The Spot light is a light cast as a pyramid. It's main use is for sources that need to have a sense of direction, such as windows or a fireplace.
A Spot light CAN cast shadows, because of this Spotlights can be used to create nice depth in levels. Casting shadows can be quite a slow down, so the use of shadow casting spot lights needs to be with care. More on this later.
Box Light
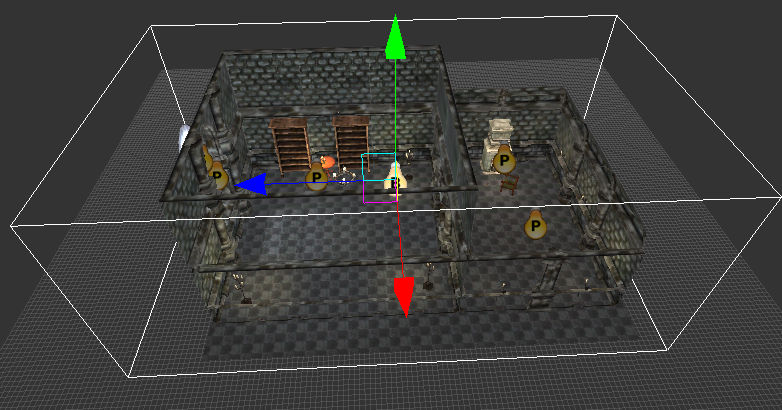
A Box light is a light typically used to give a room or a section of rooms a general ambient light. If you have a dark underground passage, you can use a box light to give the whole area a faint deep blue color. If you do not use a box light the area would be pitch black, even if you have some random Point lights or Lamp entities placed, as they would not reach so far to cover the whole area. The reason to not use a very large Point light is that the Point light has a change in intensity from the center going out, making it unusable to this type of ambient lightning.
A Box light can NOT cast shadows or show the normalmaps (the fake impression of depth) in textures. Therefore it is important to only use Box lights as faint ambient lights or when trying to create a very specific effect or else levels will look very flat and dull in their coloring.
Light summary
As you might already have figured out, the different types of lights make it crucial to use a combination of them to create the right type of light design for your level.
Lamp entities
These are entities that has a light source in them, the player can ingame use Tinderboxes to turn on the lights (if they are off). Typical Lamps are chandeliers, candles, torches and fireplaces. These entities have a lot of properties that can be setup, but that is part of the Model Editor, so for the Level editor it is more about placing the entities at logical and nice looking places. There are some specifics to keep in mind when using the Lamp entities, we have done some design choice that gives a better impression ingame but requires some extra work while creating a level.
Most lamp entities are using a Point light, as such the lights are quite small as they do not cast shadows and needs to be useable in many situations. We have also placed the actual light source a bit out of alignment. It is NOT located at the exact location of, for example, the particle effect for the burning light in a candle. This to make sure the light is cast in more of the room it is in than being cast through walls, tables and similar (where the light would not be cast if it were a shadow casting light).
List of Lamp entities that have this special placement:
- These you do not need to care about, as you place them with the back against the wall they are placed correctly automatically.
- candlestick_wall
- hanging_lantern_wall
- torch_static01
- These have the light moved X positive about 0.8 meters
- candlestick01
- candlestick02
- candlestick_floor
- torch_floor
- These have the light moved Z positive about 0.8 meters
- candlestick_tri
This means that when for example using candlestick01, you will have to rotate it so that X positive is in the direction INTO the room. The easiest way to do this is to place the entity on the floor of a room, then rotate it a bit to see how the light cast on the floor is moving around.
A final note, You will have to keep in mind how you place Lamp entities that can be lit by the player, so that if the player turns the light on it will be cast in a good way.
Connecting entities with ambient lights
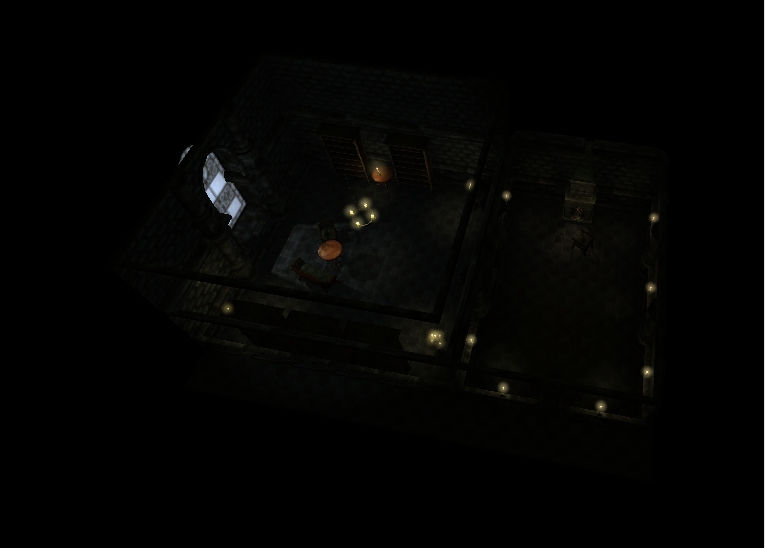
Because of the small light source in Lamp entities you will have to also place some larger light source in the level. Not for each entity, but for each group of entities. This so that the lightning looks better, otherwise you have some small lights that does not give an ambient light to the whole room see the below images.
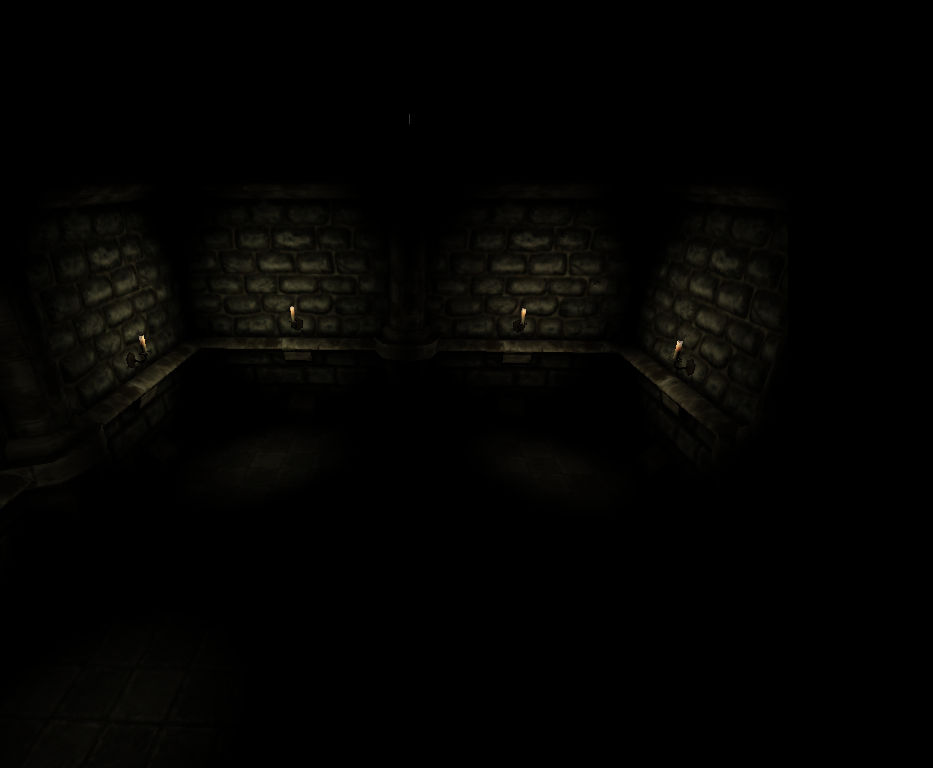
With only Lamp entities it looks strange.
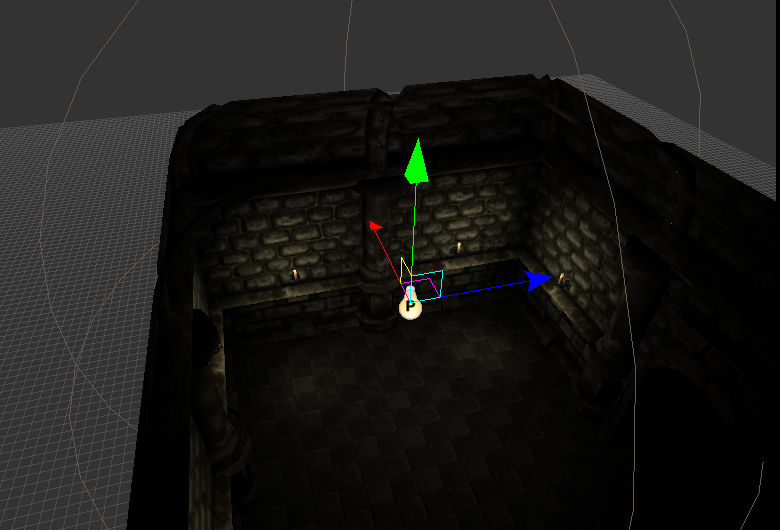
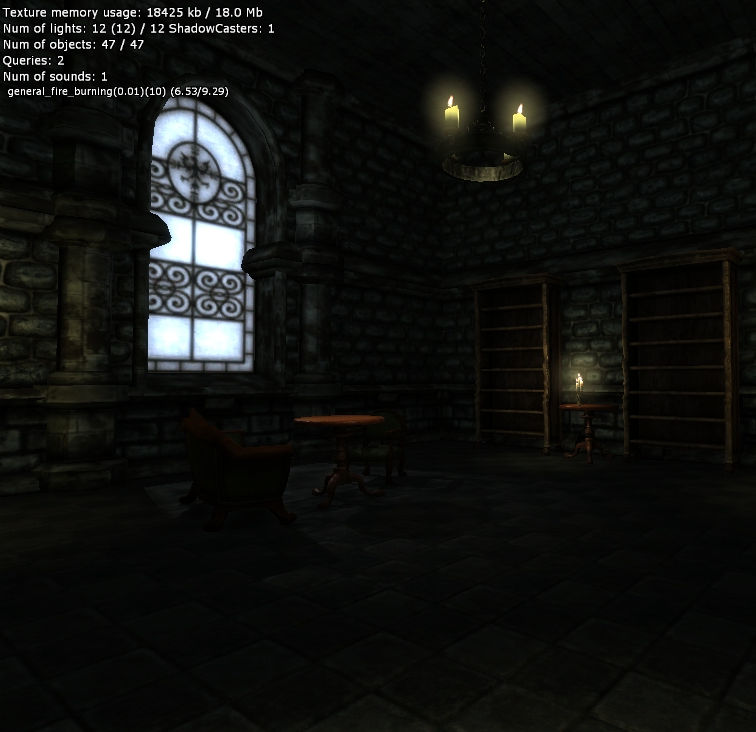
After adding an ambient Point light it looks more realistic.
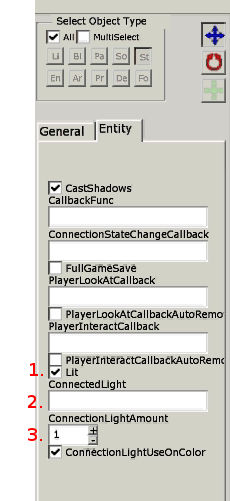
Lamp entities that are off can be lit by the player, you have to take this into account when making the light for a level. For example, if you have a room with four Lamp entities, that are all set to off, you will have to create an ambient light that is very faint and place it properly in the room. Then you have to connect the four lamp entities to the ambient light. By doing so the ambient light will increase in intensity for each Lamp entity the player lits with his Tinderboxes. The settings for this look like this:
- If the selected Lamp entity should be lit. If not checked the Lamp is off and the player will have to lit it using a Tinderbox.
- If you want to connect a light that is affected by the Lamp turning on/off, you enter the name of that light here.
- Takes the Lamp entities diffuse color and multiplies it with this value, which is then added to the light you have connected.
You enter the name of the ambient light into the ConnectedLight input and then you change the value of the ConnectionLightAmount to something suiting depending on the number of lights you have. If using four Lamp entities a good value should be about 0.1, this means that the value of the Lamp entities light is multiplied with 0.1 and then added to the value of the ambient light.
Example of how a Lamp would affect the ambient light(PointLight 1)
Lamp Entity: 1, 1, 1, 0.5 (Red, Green, Blue, Alpha)
ConnectionLightAmount 0.1: Lamp Entity Values 1, 1, 1, 0.5 * 0.1 = 0.1, 0.1, 0.1, 0.05
PointLight 1 before a Lamp is lit: 0.2, 0.2, 0.2, 0.3
PointLight 1 after a Lamp is lit: 0.3, 0.3, 0.3, 0.35
Design and placement of lights
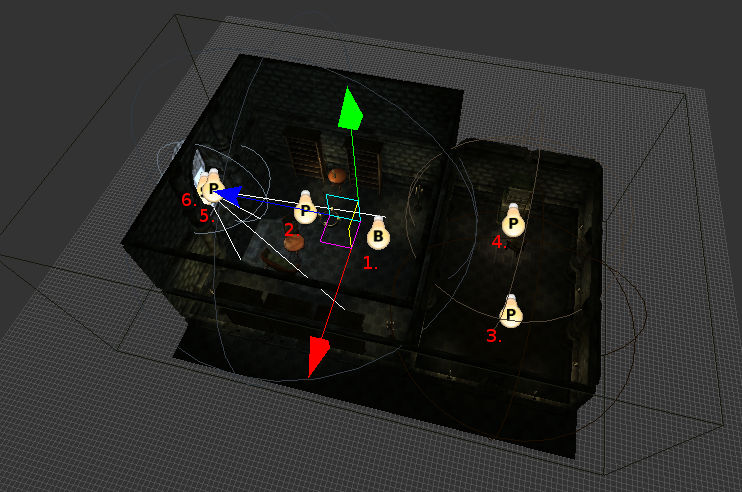
Let's take a look at how to use the different types of lights to create an overall nice light design. In the following test level I have created two rooms, one with a large window and one smaller with a fireplace. It looks like this:
- A faint Box light with a slight green tone gives a base ambient level two both rooms
- A Point light with a bit of a blue tone fills the large room, a bit more intensity than the Box light, but also very faint.
- A Point light that reaches half of the smaller room, it is connected to four Lamp entities, two are off.
- A Point light that reaches the other half of the small room, it is brighter than light 3 because all Lamp entities are already on + fireplace.
- A Point light is placed in the window, it is large enough to fill the whole window, same color as light 2, but more intense. To give the area around the window a sense of being filled with light.
- A Spot light that casts shadows and has a gobo, making it display a color pattern like the window texture.
- In addition the large room has a chandelier in the ceiling, three pedestal lights and one candle on a table. The small room has a fireplace (with a pointlight to cast light in the fireplace and a spotlight to cast a light with shadow out in the room) and 7 small candle lights along the walls.
To summarize, each room has one light that casts a shadow. What light it should be is chosen by what gives the biggest impact on the room or what would create the nicest effect. The window is obviously the brightest source of light in the large room and in the small room the fireplace is the center piece and benefits from the extra detail.
Each room has one or more large point lights, that gives an ambient light in the same color as the main light source, only less intense. In the small room these ambient lights have been connected to the Lamp Entities, as some entities are currently off they must be connected so that they will increase the intensity of the point light when turned on by player.
To speed things up, only Lamp entities and the large Spot light has an alpha that is not 0. This so that they affect the specular visibility of the objects. When using large lights such as the Box light (1.) and the large point lights (2, 3 and 4) they should not have any alpha, as it slows the game down. Only use alpha on lights that will have a nice effect.
All Lamp entities have also been rotated, so the off-placement of their Point light is towards the center of the room. This you can see if you look closely in the following to screens from the map viewer, giving a demonstration of the final look of the light design.
Optimization
Finally, the last and most important. How to optimize and make sure you have a good lightning of a level without making the level come to a crawl on slower computers.
- Spot Lights can use a much smaller radius if you place them more efficiently, they do not need to be at the exact correct location. It will not be very noticeable if the light location is not at the window, rather a few meters in and closer to the ground.
- Use different falloff maps for light, using quick falloffs you can make the radius of the lights smaller, and be more accurate in where they end.
- Avoid having too many shadow casting lights, in particular try to make sure that two or more shadow casting lights do not cross each other, that really slows down.
- When having two or more shadow casting lights close to each other (ingame they will be visible at the same time) lower the shadow quality of the lights.
- Always set Alpha to 0 for all general ambient lights. It really speed things up. Only use alpha for important lights that has some more visible intensity.
- While you can use a lot of lights and combine Spot, Point and Box lights, try to avoid having too many lights affecting the same objects.
- When using a shadow casting light you can turn of shadows on objects that do not need it. For example the floor, ceiling, walls with no other room behind it, carpets, paper, books in a shelf etc. Everything that is in contact with the light but that does not really cast a visible shadow or a very noticeable shadow. To turn off shadows you select the object and uncheck CastShadows. For entities this is under the Entity tab and for Static it is under the Static Object tab.
- A trick when dealing with many shadow casting lights that are close to each other. Turn off all shadows and alpha for the lights and then create an additional light, that casts a shadow and has alpha, make it as large as the area the other lights cover. Then by placing the new light at a good position, you can create the impression of all other lights casting shadows even though it is only the new light that casts the shadow.
