HPL1/Third party tools/Alias Maya
Alias Maya
Alias Maya is the world's most powerful integrated 3D modeling, animation & rendering solution.
The HPL1 engine didn't have it's own dedicated level editor or model editor much like it's successors, Alias Maya 7.0 was used extensively during HPL1's development for making maps, models and even animations (Maya 6.5 is also natively supported).
Alias/Wavefront has since been bought and merged with what is now Autodesk and all of their products purchased by said company, since then it has seen many revisions and incompatibility became inevitable. There is no known version that currently works with the HPL1 engine unless you have an old copy of Maya laying around.
Setup
Have a legitimate copy? Great! (Alias used node locked licenses so you must either have a legally pre-installed version or look for modern alternatives.)
Download the collada exporter here.
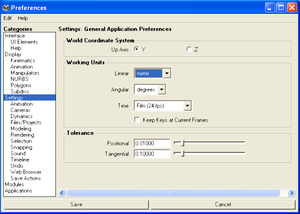
To get started, you must first set the linear units to "meter" as it's pre-set to centimeter which will export the models at the wrong scale. Please keep in mind that unlike in HPL1's succeeding engine(s), you CANNOT resize the models in your editor as you would in the newer revisions of the engines. Instead, you will have to open up the model that you created (your Maya Binary file or the exported Collada product) and resize it to your desirable scale, resizing it in the editor will have no effect and will remain the same size in which you originally exported the model with.
You must also enable the plugin by going into Window > Settings/Preferences > Plug-in Manager. Make sure you tick both "Loaded" and "Auto Load" options.
Exporting your model
Once you're happy with your creation, export it by heading over to File > Export all (you may also choose Export Selection if you do not wish to export the entire scene). All set? Great! Let's wrap a few things up first.
- Your model must have assigned at least 1 material. By default, a new object has a lambert material pre-applied. If you need to assign a new or existing one, right click and hold over your model and select Assign New Material > Lambert. You can also Assign Existing Material.
- Open your material in the Channel Box and click on the checker box next to Color to open the Material Type window. Select the type File and then click the folder icon to browse for a texture file. There is no preferred texture file format, you may choose various formats such as BMP, JPG and PNG. Adobe Photoshop is capable of exporting to such formats and was also used alongside with Maya. There are free alternatives such as GIMP, Paint.NET and MS Paint.
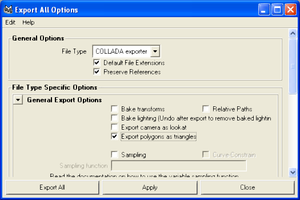
- Once you've applied a texture to your model, you can finally export it. Open the export window, then select the COLLADA exporter. Use the following export settings:
Select the Export polygons as triangles option under General Export Options.
That's it! Exporting camera and lights won't affect anything.
For a more in depth tutorial on how to create maps, head on over to Tutorial 2.1 Level Creation.
Important information on images
The material file (.mat) is an XML file that contains information on what images is used in the material to create the texture and other properties. Unlike it's successors, the HPL1 engine does NOT generate material files automatically. Instead you will have to create them manually by using the HplHelper program.
You can download the tools here if you haven't already.

