HPL3/SOMA/Level Design/Outdoor Level Performance
Contents
Level Design - Outdoor Level Performance
Introduction
This tutorial will show some steps on how to optimize an outdoor level to get better performance.
Target
Measuring performance can be hard. The main target is 60 FPS on a high end computer running at 1080p and 30 FPS on a low end computer running at 720p with low quality settings.
There are other things that are much easier to measure. Here is a list of goals for different parameters (in 1080p):
Total Memory Usage: ~700 mb (max 1024 mb)
Vertex Memory Usage: ~128 mb (max 256 mb)
Draw Calls: ~300 (max 400)
Rendered Triangles: 1.0-1.5 million (max 2 million)
Queries: ~30 (max 60)
Terrain
The terrain is the main part of an outdoor level. It should make out most of the geometry of the level.
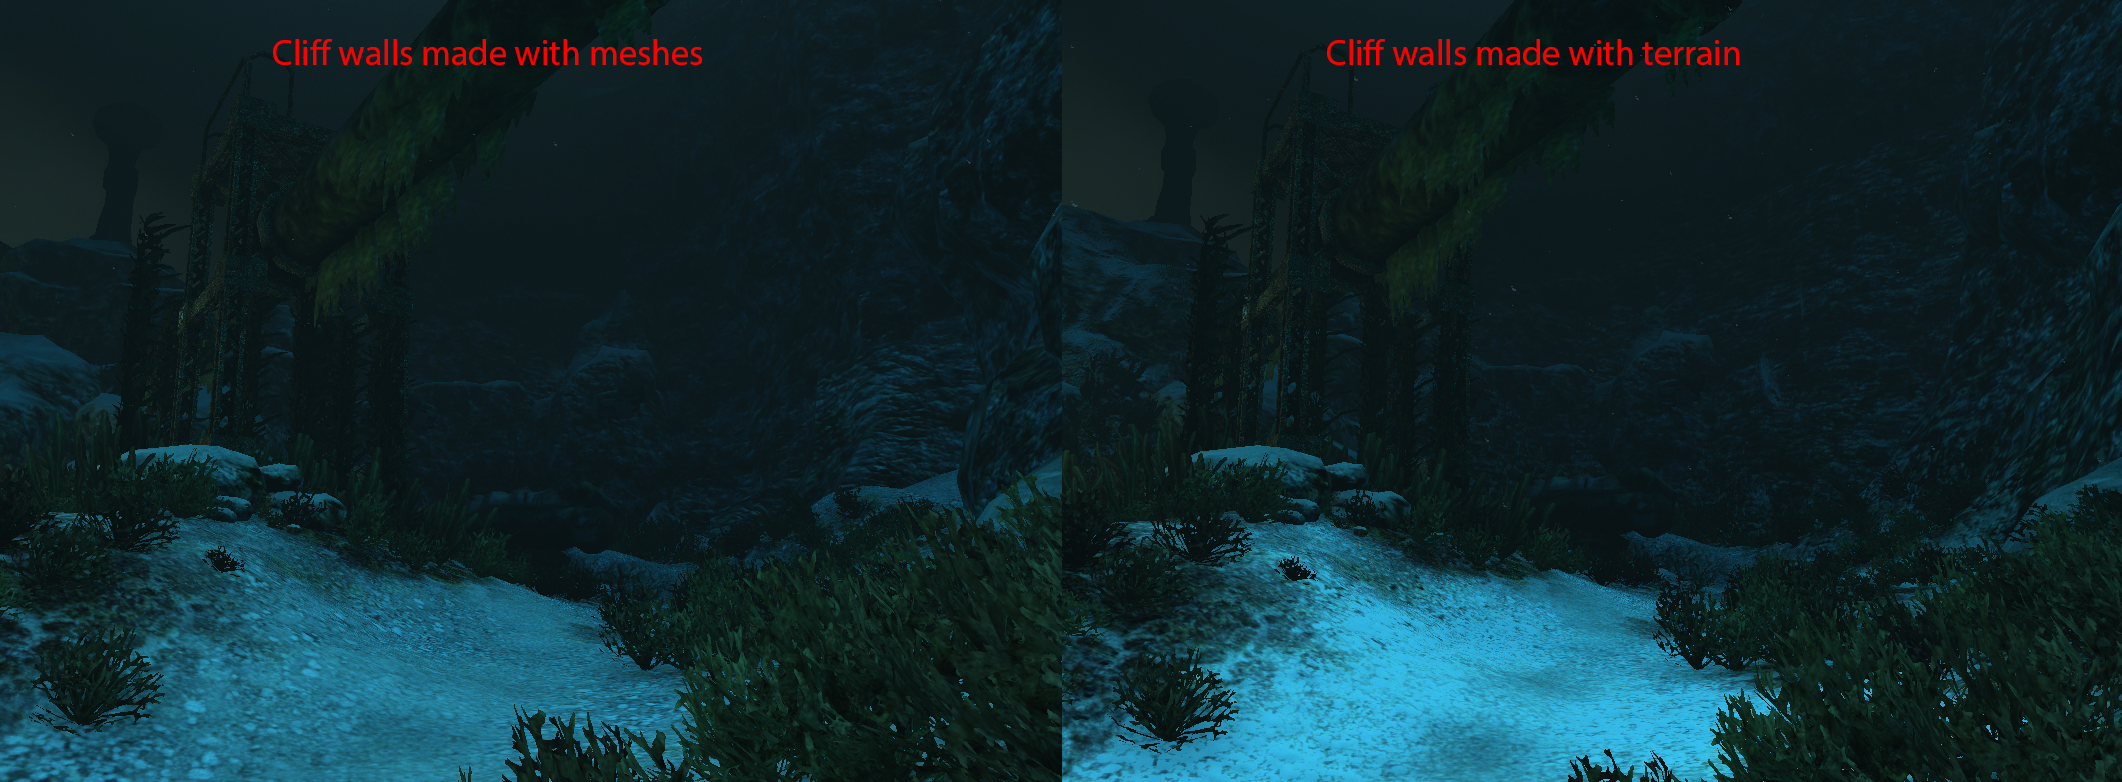
Rendering terrain is much faster than rendering multiple meshes. To get good performance it is important to use the terrain to make up most of the silhouette of the level and just use meshes for important landmarks and details.
To be able to use terrain for all of the silhouette it is possible to set a Cliff Texture. With Cliff Textures it is possible to use terrain as walls instead of having to use meshes. The cliff texture is automatically projected to the steep cliffs of the terrain.
Terrain optimization checklist:
Unit Size should be 1 or higher
Geometry Patch Size should be the same size as Texture Patch Size
Undergrowth Fade End should be 40 or lower
Don't use too many different undergrowth materials (1x draw calls per material type)
Use Cliff Texture for walls
Fog
Fog is great for adding atmosphere and scale to a level. But it can also be used to increase performance of the level.
Performance can be increased in two ways by using fog. The first is by using a fog color with alpha set to 255. Setting alpha to the max value means that objects further away than the Fog End will get fully fogged and get the color set to the fog color. Since the object gets fully fogged we can now render it without texturing which greatly increases speed.
When the alpha is set to 255 it is also possible to activate Fog Culling in the settings. This will cause any object further away than Fog End to get culled and not rendered at all. This setting should only be used when there is no need for silhouettes.
Distance Culling
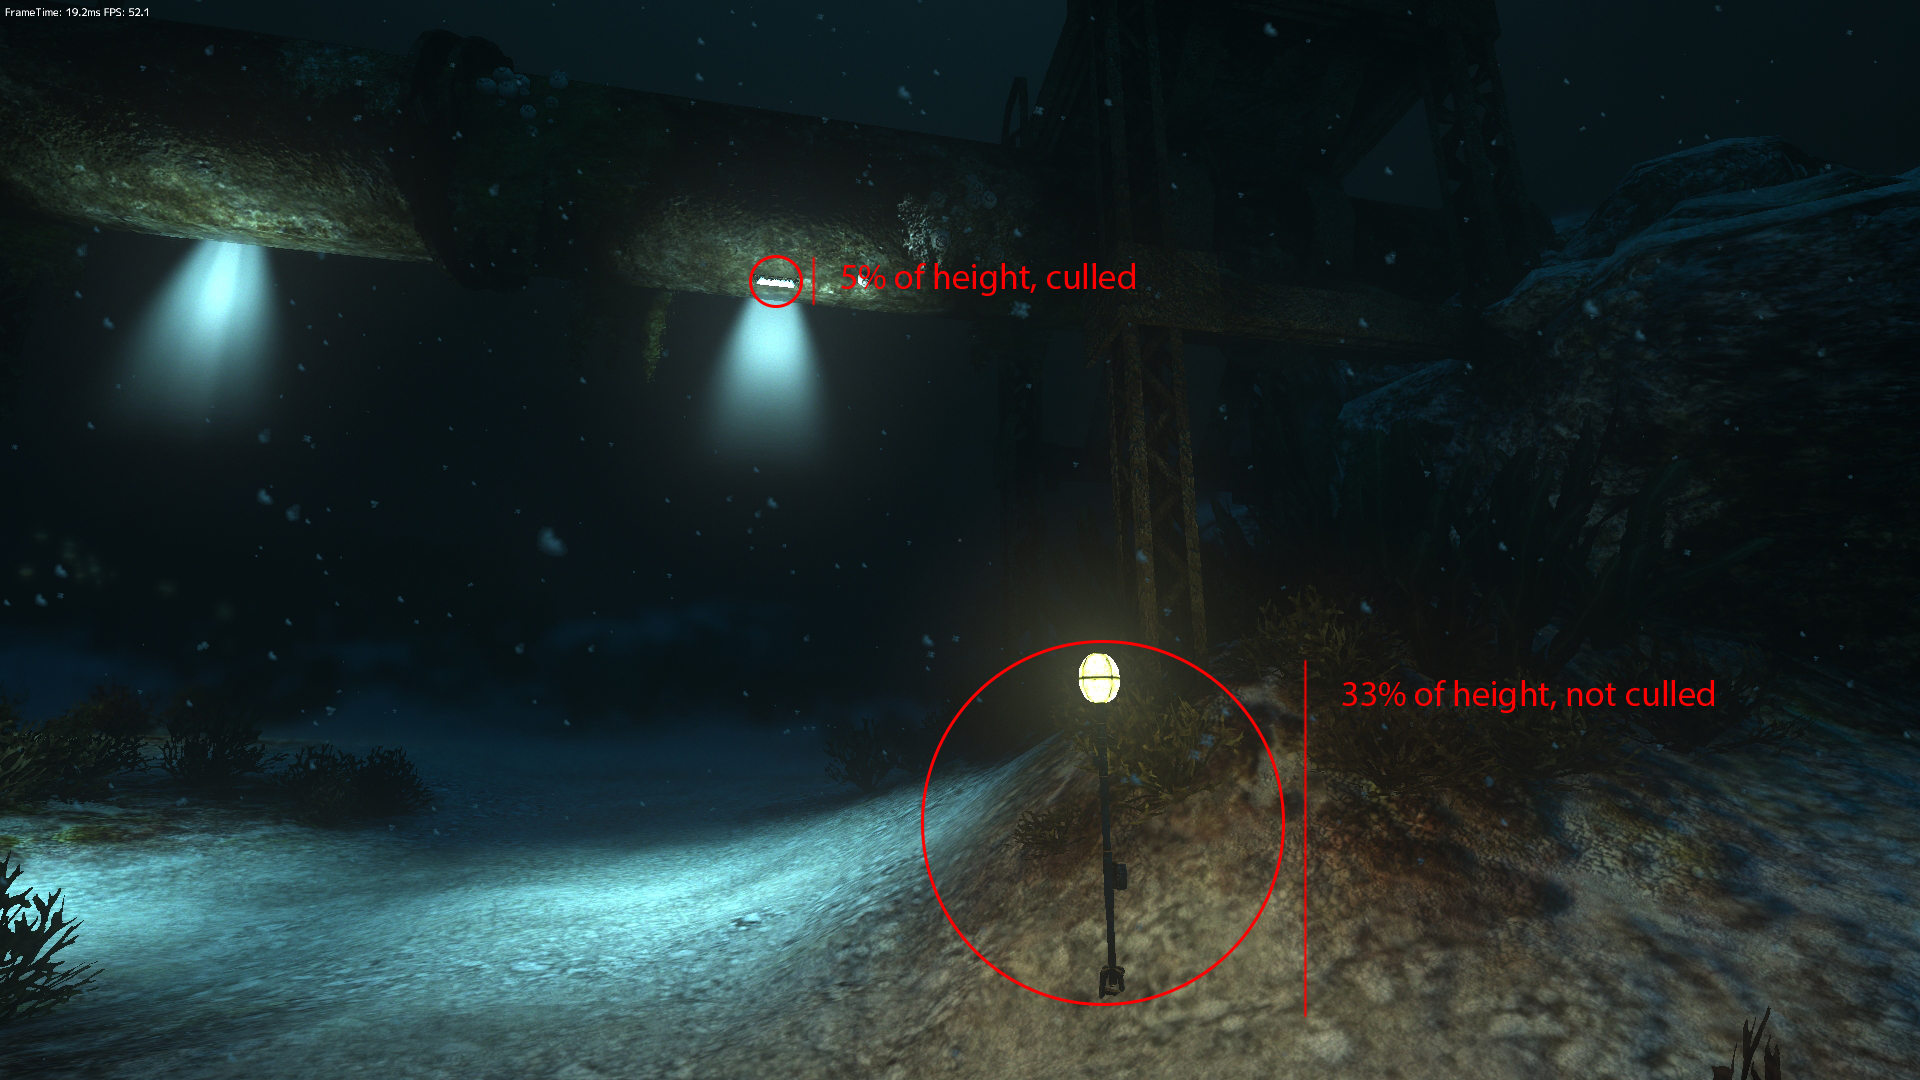
Distance culling is a technique for removing objects that are far away from the player. It works by calculating how big an object will be on the screen and then removes it if it is smaller than the selected value. It is also possible to set a minimum range, any object closer than this will never get culled.
Distance culling works on all types of objects. Objects that get culled will fade in/out and not pop directly. A good value for the Screen Size parameter is 5-10%.
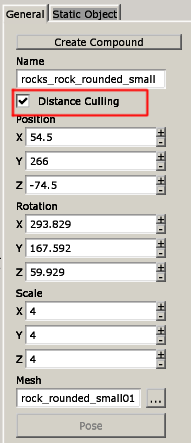
Each entity and static mesh has a setting called "Distance Culling". Having this toggled will mean that objects can get culled by distance culling. Most objects should have this toggled. The only objects that should disable distance culling are gameplay objects, landmarks and other important objects like lamps.
Distance Culling is the most important setting for getting good performance on outdoor levels.
Directional Light and Shadows
Directional light with sky and ground color should make up the base of the outdoor lighting.
Most outdoor levels also require the use of directional light shadows. This is a very expensive operation. To lower the impact of shadow rendering you will have to uncheck the "Cast shadows" checkbox for some types of objects.
Here is a list of object that should not cast shadows:
Small objects
Objects that are almost hidden in undergrowth
Objects that are only used as a silhouette
Objects that will always be far away
Big objects that the player can never reach
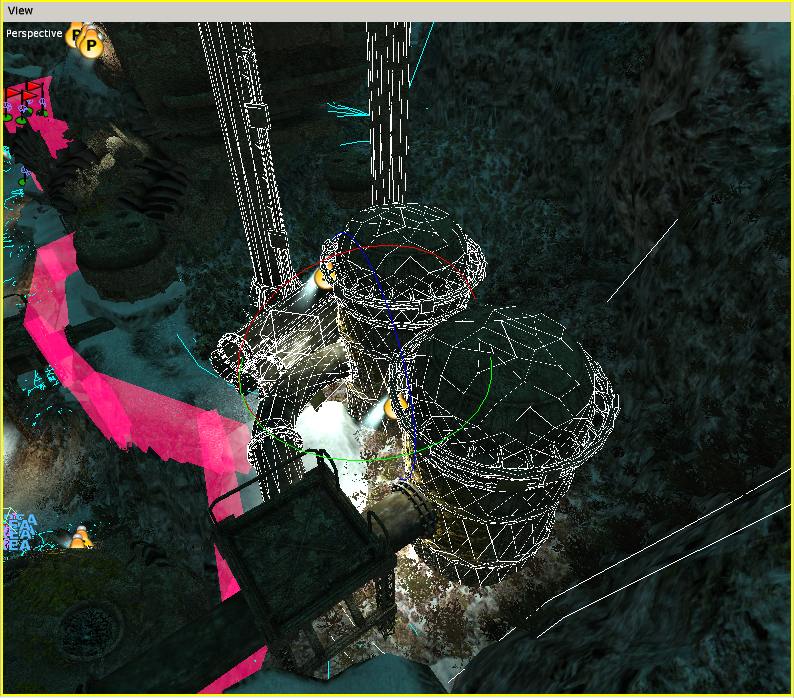
The objects selected in this picture are located above the player and can not be reached because of invisible walls. Shadow casting can be disabled for them without affecting the quality of the scene.


